Venus accommodates an unlimited number of pay and charge rate tables to meet your business needs. These tables reflect the rates of pay and charges defined by shift type, rate type, nurse type and nurse level. Rate Tables can be allocated to an individual Hospital or groups of Hospitals.
Before setting-up a Rate Table ensure all the Nurse Types, Grade / Level Types, and Shifts Types to be used in the Rate Table have been set-up in Data Entry > Types.
Rate Tables and the pay and charge information is managed in two areas –
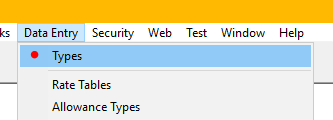
Data Entry > Types > Rate Tables tab.
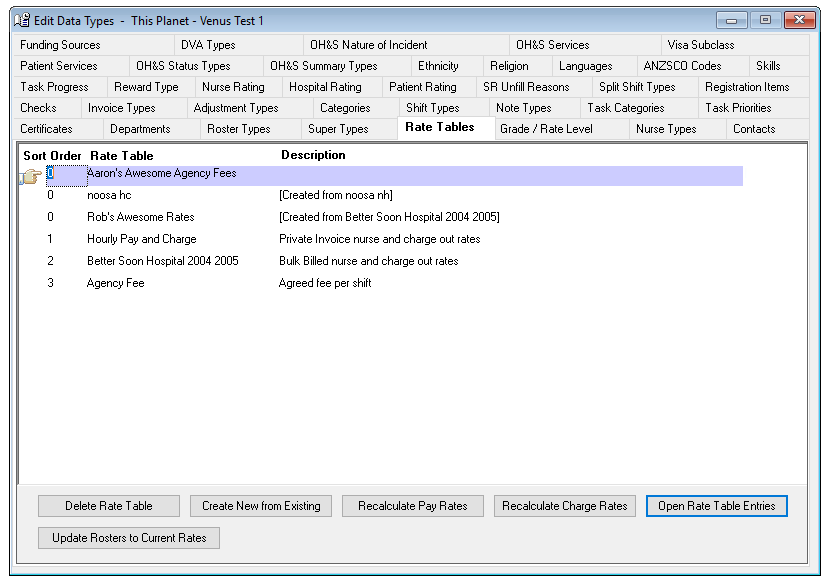
On this screen you can –
- Add the name of new Rate Table
- Create a new Rate Table from an existing Rate Table
- Recalculate pay and charge rates
- Reset rosters to new rate tables
- Delete a rate table, only if has not been allocated to a Hospital
- Open the Rate Table Details screen.
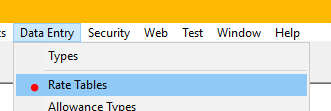
Data Entry > Rate Tables
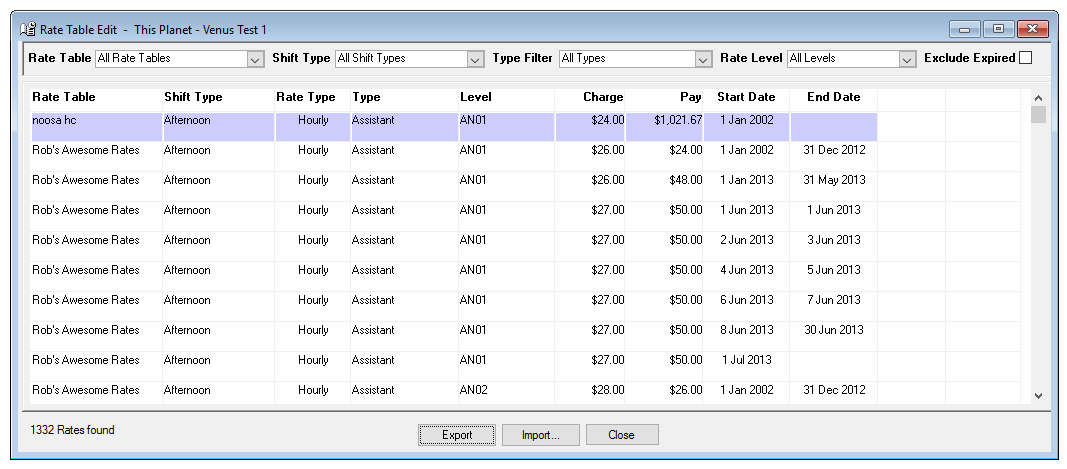
On this screen you can –
Add and edit the pay and charge rate details and amounts.
To Add a Rate Table
There are two steps to create a new Rate Table –
- Add the name of the new Rate Table
- Add the pay and charge rate details to the Rate Table.
Adding a Rate Table Name
Data Entry > Types > Rate Tables
- Select Insert on the toolbar.
- Sort Order – The order the Rate Table will appear in the drop-down menus.
- Rate Table – The name of the Rate Table.
- Description – A description of the Rate Table, if required.
- Select Save on the toolbar to save the Rate Table name.
Rate Table Pay and Charge Rates
Data Entry > Rate Tables
There are two ways to open the Rate Tables screen –
- Data Entry > Rate Tables or
- Data Entry > Types > Rate Tables tab select the Open Rate Table Entries button
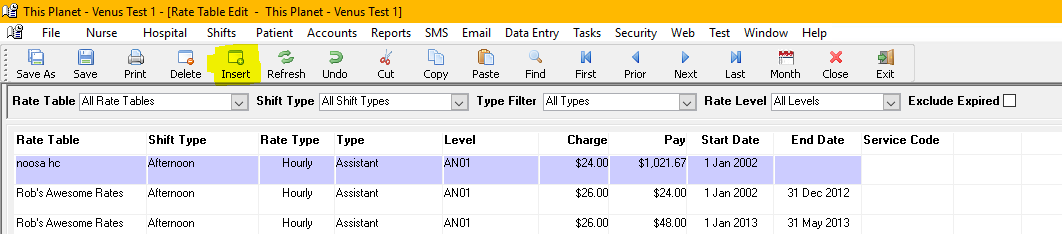
Record pay and charge rates on the Data Entry > Rate Tables screen
- Select the name of the Rate Table from the drop-down menus.
- Select Insert on the toolbar for a new line and enter the required information.
- Rate Table – The name of the Rate Table from Data Entry > Types > Rate Tables
- Shift – Type of shift from Data Entry > Types > Shift Types
- Rate Type – Hourly Rate or Agency Fee.
- Nurse Type - Type of Nurse from Data Entry > Types > Nurse Types
- Level – Grade / Rate Level from Data Entry > Types > Grade/Rate Level
- Charge – The amount charged to the requestor
- Pay – The amount paid to the Nurse
- Start Date – The start date of the rate
- End Date – The end date of the rate
An entry must be recorded for each combination of Shift, Nurse Type and Level for each Rate Table
To edit a rate table entry –
- Select – the Rate Table name, the Shift and the Nurse Type from the Filters.
- Update the information as required, Shift, Hourly Rate or Agency Fee, Type of Nurse, Grade/Level, Pay Amount, Charge Amount and Start Date.
The edited rates will apply to all new rosters created.
If the rates on outstanding rosters (i.e. unpaid and un-invoiced) need to be updated to reflect the new rates, use the Update Rosters to New Rate option on the Data Entry > Types > Rate Table tab.
Important Points
- The name of a Rate table is recorded in the Data Entry > Types > Rate Table tab before the applicable pay and charge rates are entered in the Data Entry > Rate Table Details screen.
- A pay and charge rate must be recorded for each combination of Shift, Nurse and Grade/ Level for each Rate Table.
- Rate Tables are attached to Hospitals on the Hospital Details tab.
- Reports to help check the accuracy of the Rate Tables can be found at Reports > Rate Table Reports.
- As the combinations of Shift, Nurse and Grade/Level would be similar for each Rate Table it is suggested that Create a New Rate Table from an Existing Rate Table is utilised after the first Rate Table has been fully populated. The newly created Rate Table can then be modified as necessary.
Rate Table Detail Filters
Data Entry > Rate Tables
The Filters on the Data Entry > Rate Tables screen make it easy to locate and review specific rates or groups of rates.
The five Rate Table Filters are -
- Rate Table
- Shift Type
- (Nurse) Type and
- (Nurse) Level
- Exclude expired (rates)
You can use one or a combination of the filters.
To Create a New Rate Table from an Existing Rate Table
Data Entry > Types > Rate Tables
Venus can create a new Rate Table from an existing Rate Table. If the new rates are based on a percentage or fixed amount variation of existing rates use Recalc Pay Rates and Recalc Charge Rates to quickly update the Rate Table.
To create a new Rate Table from an existing Table –
- Go to Data Entry > Types > Rate Tables
- Highlight Rate Table to be used as the base for the new Rate Table.
- Select – Create New from Existing.
- Enter the name of the new Rate Table.
- OK – To create the new Rate Table.
- Cancel – To exit without creating.
To Delete a Rate Table
Data Entry > Types > Rate Tables
You cannot delete a Rate Table that has been allocated to a Hospital.
To delete a Rate Table not allocated to a Hospital –
- Highlight the Rate Table name.
- Select – Delete Rate Table.
To Add New Rates to an Existing Rate Table
Data Entry > Rate Tables
To add new rates to an existing rate table:
- Export the rate table from Data entry > Rate Table and save in your directory.
- Update the rates in excel including the Start Date
- Select Import on Data Entry > Rate Tables and then import the rate file from your directory.
- Correct any errors identified by Venus. If there are any errors they will be in red.
- Import the information.
When adding new rates with a new start date to an existing Rate Table, Venus will add an End Date to the existing rates. The End Date will be the date before the new Start Date.
Exporting and Importing Rate Tables
Data Entry > Rate Table > Export and Import buttons
New rate tables can be imported into Venus in a CSV file.
Existing rate tables in Venus can be modified by exporting the rate details using the Export button on the Rate Table Details Edit screen, modify the rates and then import the new rates back into Venus.
When importing rates into Venus:
- The information will be checked and validated by Venus: i.e. Rate Table name, Nurse types, Shift type, etc.
- A list of rates that did not pass the validation test will be displayed. The rates can be edited on screen.
- When all the rates meet the validation tests, the rates can be imported into Venus.

To import a New Rate Table:
Record the name of the new Rate Table under Data Entry > Type > Rate Tables.
- Select Import on Data Entry > Rate Tables and then import the rate file from your directory.
- Correct any errors identified by Venus. If there are any errors they will be in red.
- Import the information.
The Rate Table Import File Format:
Data Entry > Rate Table > Export and Import buttons
The format of the CSV file is detailed below. If the first row contains column headings, you will need to select the ‘First row contains headers’. If any column contains commas, the contents will need to be enclosed in double quotes e.g. Rate Table name.
- Rate Table name*
- Shift Type *
- Rate Type *
- Nurse Type *
- Nurse Level *
- Charge Rate
- Pay Rate
- Start Date * (format: dd/mm/yyyy)
- End Date (format: dd/mm/yyyy)
*Mandatory details
Functions on the Rate Table Details Import screen
The following buttons are located at the bottom of the Rate Table Details Import screen.
Load Import File – Selects and loads the Rate Table Details Import file.
Import File Format Help – Describes the required Rate Table Details Import file format.
First row contains headers – Select if first row of import file contains column headings.
Validate Row – Validates a single, highlighted row.
Validate All – Validates the entire file.
Delete Row * – Deletes a single, highlighted row.
Delete All * – Deletes all rows displayed.
Invalid Rows Report – Creates a report that details all invalid rows and the errors detected.
Import – Import the error free data into Venus.
Close – Closes the Rate Table Details Import screen.
* NB – Any changes made do not alter the original import file.
To Recalculate Pay Rates
Data Entry > Types > Rate Tables
Highlight the name of the Rate Table to be recalculated.
- Select – Recalculate Pay Rates.
- Enter either the percentage or amount variation to the Pay Rates. (can be negative)
- OK – To recalculate the rates.
- Cancel – To exit without recalculating.
- If the new rates are a combination of a percentage and fixed amount changes, each step must be completed separately.
Recalculate Charge Rates
Data Entry > Types > Rate Tables
- Highlight the name of the Rate Table to be recalculated.
- Select – Recalculate Charge Rates.
- Enter either the percentage or amount variation to the Charge Rates. (can be negative)
- OK – To recalculate the rates.
- Cancel – To exit without recalculating.
- If the new rates are a combination of a percentage and fixed amount changes, each step must be completed separately.
- Select – Reset Charge Rates to Pay Rates if the Hospital Invoice Type is commission based i.e. Percentage or Bulk Billed. (see Invoice Type under Adding a Hospital)
When the Pay and Charge Rates for the new Rate Table are correct, the Rate Table must be allocated to the appropriate Hospitals (Hospitals > Hospital Details tab) for the new rates to be applied to new rosters.